Showing posts with label christmas. Show all posts

Friday, December 14, 2012

{Tutorial} diy Christmas Wreath


I recently took a trip to our local Lowe's store and found that they were giving away Christmas tree scraps and foliage.  We have an artificial Christmas tree and I so miss the smell of a real Christmas tree in our home.  I decided to take advantage of the scraps and knew that I could incorporate them into our holiday decor indoors but thought it would be so nice to create a wreath made of real foliage for our front door. 

Once I arrived home, I browsed on Pinterest and knew that I would be able to find an easy DIY tutorial to help me make a wreath and found the perfect one from fellow fellow

Here’s what you’ll need:


- A wreath ring (any size and material you like)
- Green florist wire
- Various types of foliage, flowers, and berries

Note: Fragile plants won’t work too well here, look for hardy wooded plants and sticks that will last a while without water. Also, including some foliage with more volume and leaves helps to fill out areas and hides the wire better.

Step 1.
Cut your foliage into manageable pieces. My ring is 30cm (12″) and I cut them to around 13cm (5″).

Step 2.
Wind a loop of wire around the ring edge and secure. Keep the wire attached to the roll, it’s a handy way to continuously pass the wire around the wreath.


Step 3.
Take one or two of your foliage pieces and lay them over the wire. Bring the wire around the ring and over the foliage stems to keep them in place. Keep the wire fairly tight so they don’t shift around.


Step 4.
Always work in the same direction. Place the next piece overlapping the bottoms of the last so as to cover the wire. Bring a loop of wire around again and secure tightly.


Step 5.
Continue this way (not forgetting to also cover the inside edge and outside edge as well) until you reach the start again. Finish off by hiding the stems of your final foliage pieces under the tops of the first pieces you put down. Carefully wind the wire around a final time, keeping it hidden as much as possible under foliage. Once you’re sure it’s all secure, cut the wire and secure the end under the wreath.

Step 6.
Now you can look at your wreath overall and gently maneuver pieces that seem out of place, or even add new pieces if you think it needs it.
That’s it! You can add a ribbon later if you want to, or a hook of wire at the back for hanging. Most of all, just enjoy the process and have fun with it!


 For more fun and festive DIY wreath ideas, click HERE.

Friday, December 23, 2011

{Tutorial} Peppermint Macarons


A few days ago, I put together ideas for planning a Pretty Peppermint Party.  One of desserts I found were these fabulous Peppermint Macarons I spotted on Studio DIY.  As you know, I LOVE macarons and have been on the quest to find an easy step-by-step tutorial.  What better time than to try and create macarons for holiday parties?  I wanted to see if I could find out who the creator behind the beautiful treats was.  I came to find out the stunning photos of the macarons is also the creator of the gorgeous macarons.  Stacy Able is not only a fantastic photographer, but she has quite the passion for making macarons.  Stacy is sharing her Peppermint Macarons today and I hope you enjoy them as much as I do.  Wouldn't they make the perfect gift wrapped in pretty paper packing for the holidays?

Peppermint Vanilla Bean Macaron Recipe

Ingredients
200g almond flour
200g powdered sugar
80g egg whites
80g egg whites
200g regular sugar
80 ml water
1 vanilla bean pod, seeds scraped out
2-3 drops of peppermint extract
Red food coloring (optional)
Crushed Candy Canes (optional, for finishing)

Directions

Heat oven to 355F
Separate egg whites ensuring there is absolutely no egg yolk. You may set the egg whites aside for 2-3 days in a refrigerator to “age”.
Measure out egg whites into two small containers with 80g in each.


Measure out almond flour and powdered sugar; add to food processer or spice grinder and pulse. Once the sugar and almond flour is a fine texture, sift 2 times; add
the vanilla seed scrapings, peppermint extract, and 80g of egg white, set aside.


Cook sugar with water in a pot over medium heat with candy thermometer. Gently swirl the water and sugar a few times so it cooks evenly. When the temperature reaches 230F take the pot off the oven.
While sugar is cooking, Begin whipping the other 80g of egg whites with stand or hand held mixer. When eggs are in a soft peak drizzle the 230F hot sugar syrup down the bowl in a thin stream and continue beating until you get a firm, shiny meringue.


Pour half of the almond/powered sugar ingredients into meringue and stir ensuring you scrape the sides and bottom. Add the second half and stir. Note: do not over stir. You want the batter to look like a thick magma that when dropped in the bowl slowly absorbs into batter. Over stirring creates flat, pancake, cracked cookies.
Place parchment on a cookie sheet and trace 1 inch circles on the parchment then flip the parchment as you do not want pen marks on the cookie.


In a pastry bag use a plain round tip and pipe out circles on your parchment. You can create swirled color by adding a few drops down the side of the pastry bag or a solid color by adding a few drops of color while mixing the egg white/almond/sugar ingredients. Once you have your circles piped, firmly hold the cookie sheet and rap the sheet against a counter a couple times. This is done to help form the foot/pied bottom of the macaron.


Let the dough sit for 15-30 minutes to form a soft non sticky shell.
Place in oven for 11 minutes and put a wooden spoon or chopstick in the door to let some heat escape. Note- this will produce a slightly chewy Macaron which is traditional without browning the cookie. If you’d like them done slightly more you can cook at 300 for 20-25 minutes.
Once cookies are done, pull them out of the oven and let them cool. Do not remove from parchment until cool as they may stick. Pull up the corner and gently peel from the Macaron or use a metal spatula to gently remove shells.
To complete the cookie, make a simple butter cream and add a few drops of flavoring. For this recipe, we used a few drops of peppermint extract. Spoon icing onto macaron shell and gently press the two sides together.


Roll the cookie into crushed candy canes.


Macaron shells will last 3-4 days if left on the counter. If unfilled you can freeze the cookies then thaw and fill for an instant glamorous treat.


All Photos by Stacy Able Photography

Thanks so much Stacy for sharing your Peppermint Macaron recipe and tutorial.  I cannot wait to try the recipe and I know the macarons will be a hit at our next party!  I hope that everyone will enjoy making the French treats!

Thursday, December 22, 2011

{Guest Post} The Sweet Adventures of Sugarbelle


I am delighted that Callye of The Sweet Adventures of Sugarbelle is stopping by.  I have been a HUGE fan of Callye's amazing creations for quite some time.  Each cookie that Callye decorates is seriously a gorgeous piece of art.  Today, she is sharing an easy step by step tutorial for making holidays cookies inspired by my Christmas Chevron design.  Get ready to swoon!

Hi, I am SweetSugarBelle, and I am almost obsessed with cookie decorating. Christmas is one of my favorite times of year because it's all about cookies. Cookie decorating often has a reputation for being difficult, but with a few tips it's much easier than it seems.
Today I am going to show you how easy it can be to make cookies that perfectly coordinate with your party decor.


These designs didn't just fall out of my brain. They were actually inspired by this photo of Stefanie's gorgeous holiday collection. I picked out a few of my favorite elements of the design. My eyes were immediately drawn to the chevron print, the splash of off-lime green, and the adorable font. To make these into cookies I decided to put my own spin on these elements.


To decorate these cookies you will need:
  • white piping and flood icing
  • red piping and flood icing
  • green flood icing
  • toothpicks
  • Christmas colored non-pareils
If you need an easy and tasty cookie recipe, click HERE.
For royal icing, click HERE.

*note...be prepared to work fast. This technique is easy for beginners, but the icing dries quickly so work one cookie at a time.
Begin by outlining the cookie using a
#2 tip and flooding it with white icing. If you need more help with this, click HERE.

 
As soon as you have filled the cookie, use the red and green flood icing to create alternating red and green lines in the wet white icing. This technique of dropping wet icing onto wet icing is called wet on wet. When the cookie is striped, quickly drag a toothpick up and down through the lines in a wavy fashion.

 
Let the cookie dry for eight to ten hours and that's all you need to make simple chevron cookies
I also made "JOY" cookies based on Stefanie's printables. I began by outlining and filling a cookie as shown above. After the cookie dried overnight, I used a #1.5 tip to pipe the word joy onto the cookie. This is a lot simpler than it seems.
First of all, I chose that particular word because it's the shortest, therefore it has less chances for me to goof.
Begin by piping the middle letter in the center of the cookie. This helps to keep things centered. Being sure to work slowly {this is the key} add the rest of the letters slowly and carefully making sure the tops and bottoms are even.

 
Let the words dry completely {about an hour or so} and then add a sprinkled border by piping an outline, then dipping or sprinkling them with sprinkles.

 
Let dry and you will have an impressive yet easy set of cookies for your Christmas party or gift.


Do not let the thought of decorated cookies or royal icing intimidate you. With a little help and practice, you can make cookies like these!
For more tips, tricks, and recipes, visit my blog The Sweet Adventures of SugarBelle. I'd love to share many more fun cookie decorating ideas!

I hope you''ll make these soon! Happy Holidays!

Thanks so much Callye for sharing your cookie magic with us today!
Be sure to check out Callye's blog where you will find oodles of fabulous cookies, recipes, tutorials and fun extras!!

Wednesday, December 7, 2011

{Inspiration} Fun & Unique Holiday Wreaths


The holiday season is officially upon us.  We put up all of our Christmas decorations and I love having all of the festive decor up.  Wreaths are incredibly popular during the holiday season and are a fun and easy way to decorate and dress up a space.  I not only have one on my front door to greet guests but I include them in the decor inside our home as well!  I thought it would be fun to put together a round up of wreaths that are unique and are sure to stand out and "wow" your guests. These wreath ideas are ones that you can easily recreate for your home this holiday season!


Monday, November 21, 2011

{New to the Shop} Chevron Christmas Collection


Are you getting in the spirit of the holidays? Hot cocoa, baking and decorating cookies are a few of my favorite holiday traditions.  We're getting closer to Christmas especially with the most popular shopping day happening this week.  What better way to decorate your presents and holiday decor than with our newest collection? I am excited to share with you our Chevron Christmas collection.  I created this collection using one of my favorite patterns called Chevron along with traditional Christmas colors of red and green. 


You can use this printable to make cupcake toppers, gift tags, party favors, labels, stickers and more!  They make the perfect touch for all of those presents that need wrapping.


Formatted for an 8.5 x 11 sheet with 12 squares.

Print on heavy card stock, matte photo paper or 8.5 x 11 full size label sheets to make stickers. Cut to make squares or use 1 7/8” and 2” circle and scallop circle paper punches.

The Chevron Christmas Holiday Collection is available in my SHOP!


Get your 2 inch scallop circle punch HERE.

Enjoy!

Tuesday, November 15, 2011

{New to the Shop} Merry & Bright Holiday Collection


I can't believe that the holidays are around the corner.  As the holiday decorations go up in stores, it gets me in the spirit of Christmas.  I am excited to share with you our newest collection for the holidays called Merry & Bright.  I wanted to use one of my favorite color palettes which includes a turquoise blue, red, berry pink, orange and an apple green. This is one of my favorite collections that I have made as they are so cheery and colorful!


You can use this printable to make cupcake toppers, gift tags, party favors, labels, stickers and more!  They make the perfect touch for all of those presents that need wrapping.


Formatted for an 8.5 x 11 sheet with 12 squares.

Print on heavy card stock, matte photo paper or 8.5 x 11 full size label sheets to make stickers. Cut to make squares or use 1 7/8” and 2” circle and scallop circle paper punches.

The Merry & Bright Holiday Collection is available in my SHOP!


Get your 2 inch scallop circle punch HERE.

Enjoy!

Monday, December 20, 2010

Decoupage Ornaments

Photobucket

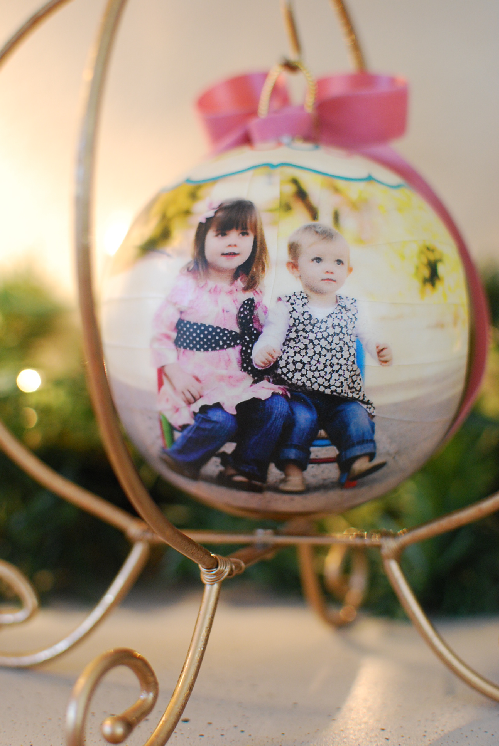
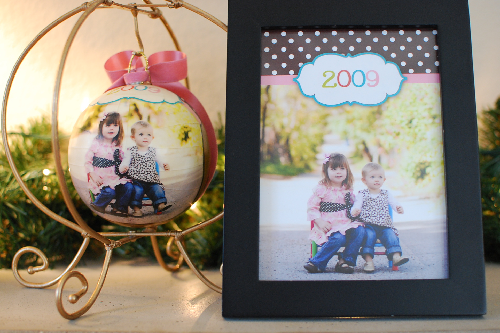
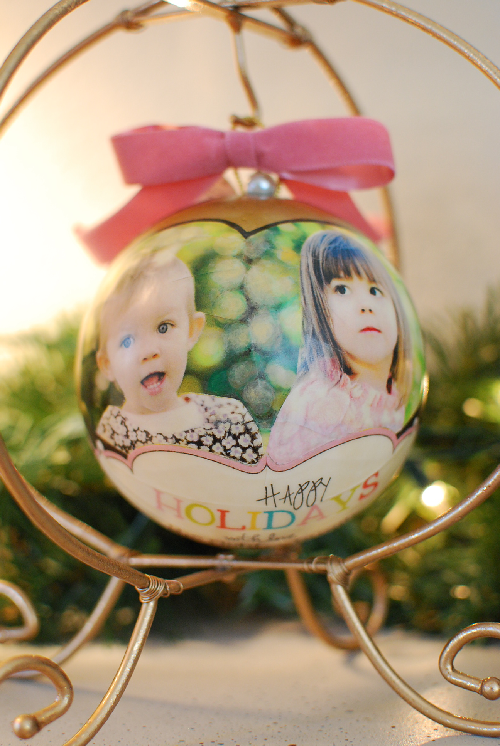
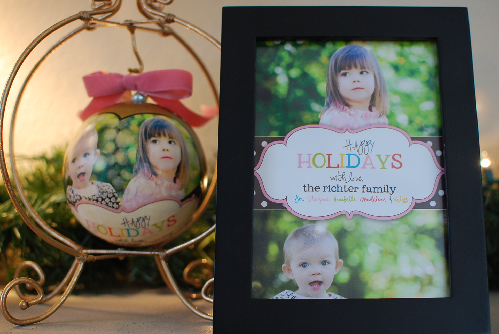
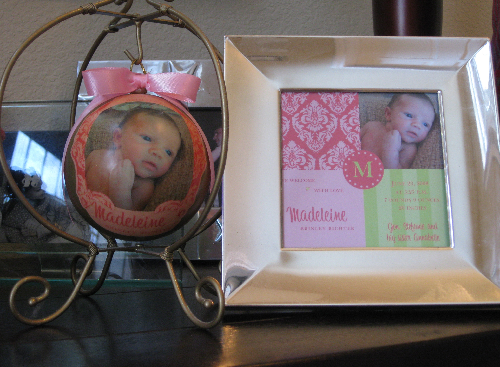
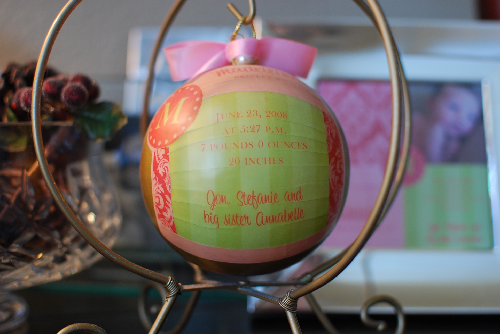
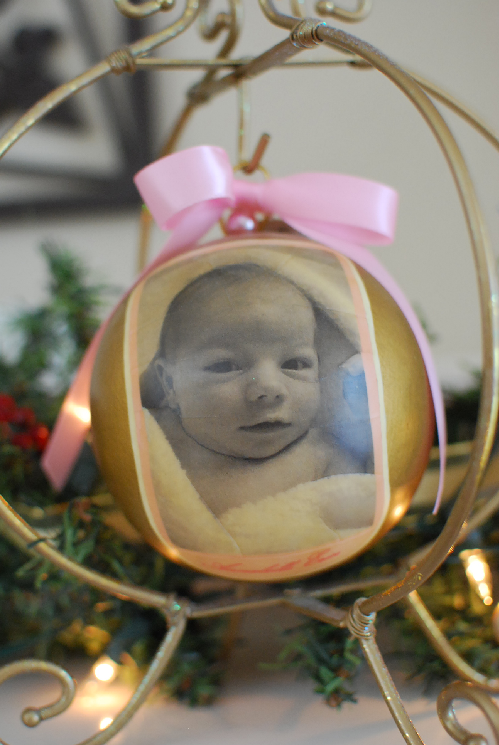
When the girls were born, my sister in law Michelle had the most creative gifts made for us. They are decoupage ornaments designed from their birth announcements. I love them SO much that I display them year round on our fireplace mantel for everyone to see and this way we can enjoy them all the time. I placed my own order a few years ago. Going forward, I order an ornament each year made from the previous year's Christmas card. We received this year's order a few days ago. Orders are due in the summer so it has been a long wait to see the final product.
The beautiful decoupage ornaments are created by Betty Houston of BVH Keepsake Decoupage Ornaments.

Photobucket

I was thrilled with how amazing this year's ornament turned out of the girls!

Photobucket

Photobucket

Such detail and intricate work!

Photobucket

Photobucket

Photobucket


Betty's Decoupage Christmas Ornaments start out with just plain ole Styrofoam balls.
This is the "prep' stage which starts out with initial sanding of each one, and now 5-7 coats of base paint (sanding in-between) goes on to make the balls as smooth as possible before putting on 3 coats of gold paint, making them ready for decoupage of 12-15 coats of varnish.


The final product. Just beautiful! A beautiful keepsake for years to come.

Some of a former year's finished products: The Ornaments.......and Betty!


Is the Library "Show Room" for all finished ornaments before home pick-up and UPS shipments.
(Not shown is the table full on the other side of the room.)


Betty estimated that by 2009 she made 6,500 ornaments since she first created them for my booth at the Charlotte Christmas Show in 1971.

If you would be interested in ordering a decoupage ornament, please contact Betty at bvh-art@earthlink.net and mention that anna and blue paperie sent you.
Related Posts with Thumbnails
 
Pin It button on image hover